Resolving clashes
Clashes in the schedule of resources can be easily viewed so that adjustments can be made to remove them.
To view clashes:
-
Click on Settings | Show Availability. Your Gantt view is now in Availability mode.
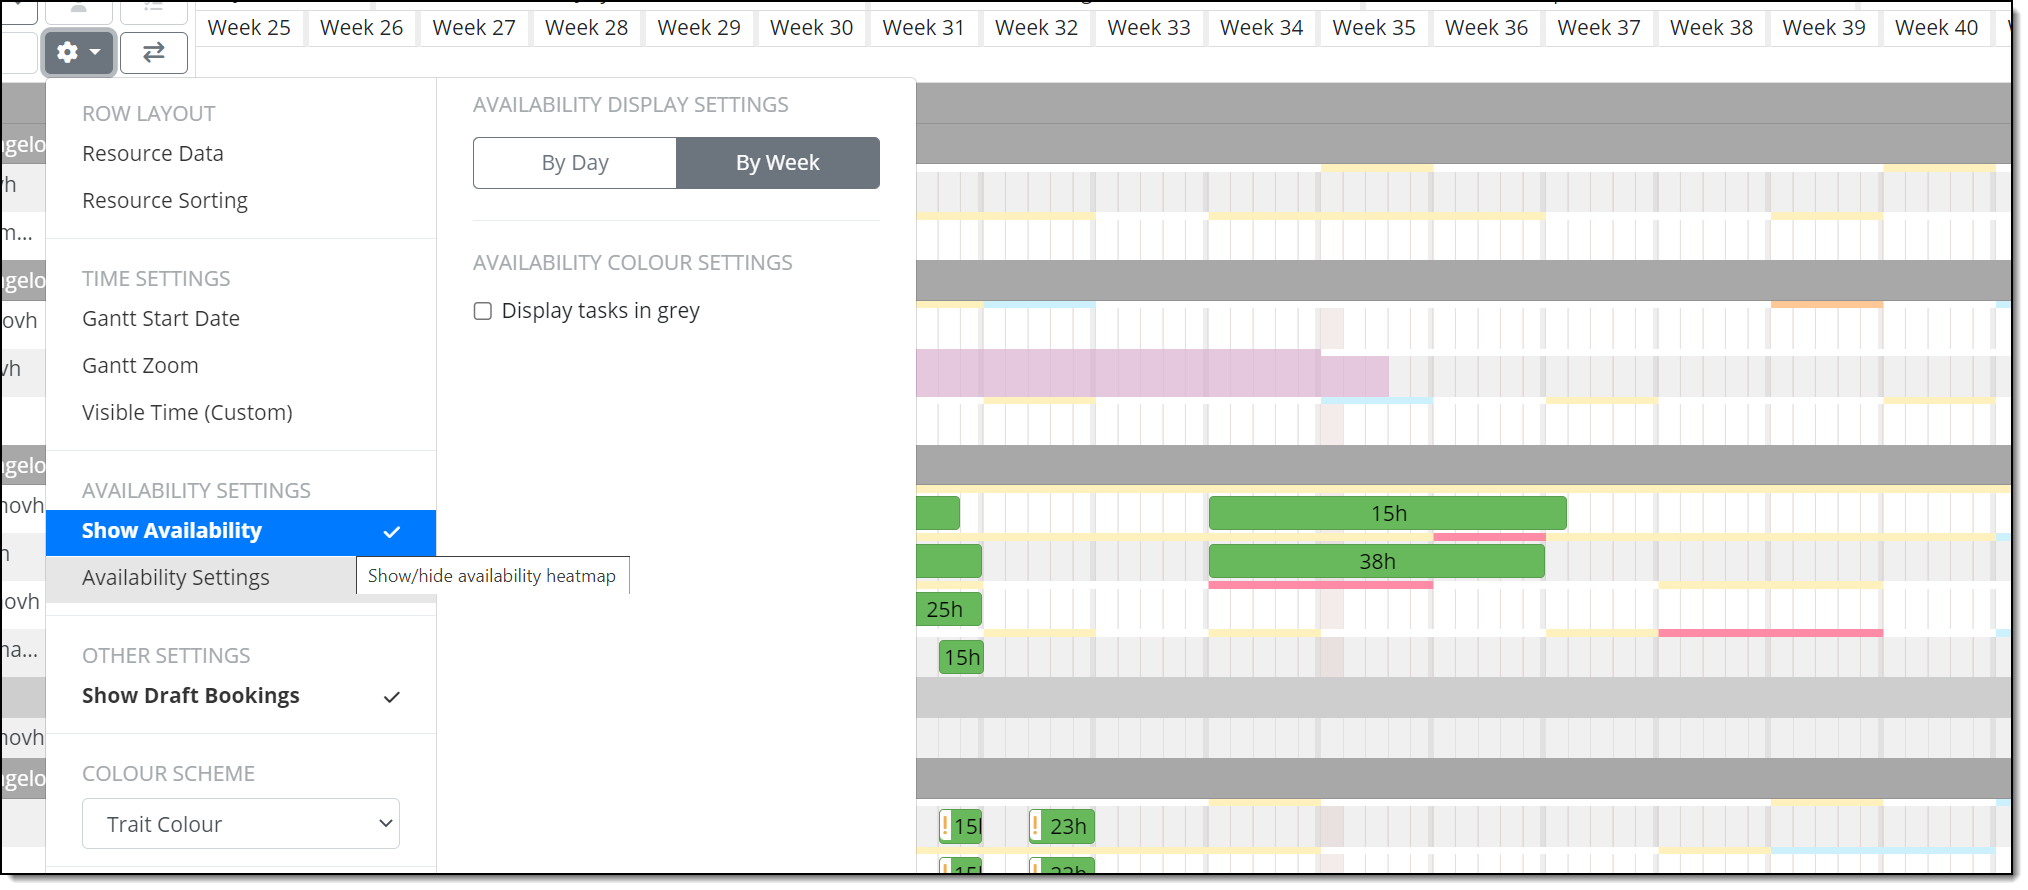
-
Above each resource row you can now see thin coloured bars detailing their availability. By hovering over each of these coloured lines you can see the percentage availability along with the hours of work allocated to that resource.

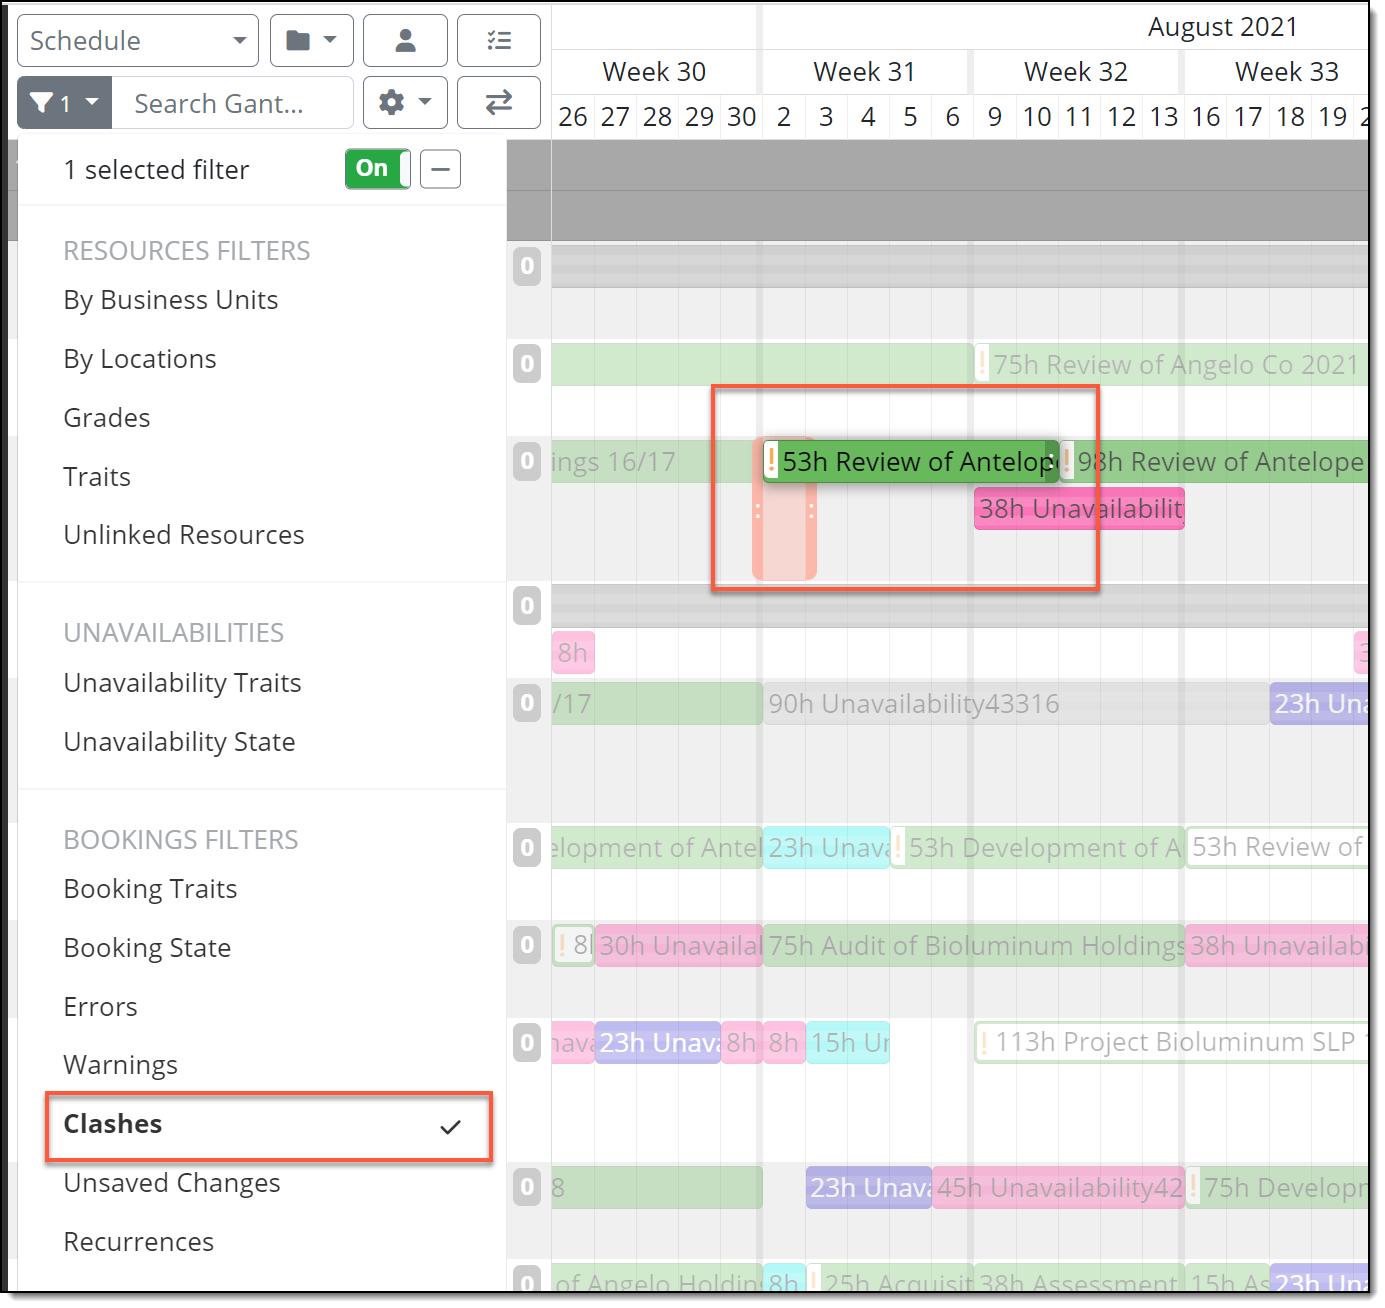
To view clashes, you can change the view of the Gantt by selecting Clashes in the filter menu. Where clashes exist, these are highlighted in the Gantt and all other bookings blurred out.
To see clashes whilst you are adding bookings to a Resource, leave the Gantt in Availability mode when working. Now, as you create, any clashes will turn the booking red, so you know what step to correct.
Bookings which clash (i.e. a booking is inside an availability period that has more than 125% utilisation) can now have a warning displayed against them in the Gantt sidebar (user permission dependent). The warning (highlighted in the example Gantt sidebar below) has a filter button next to it, which when clicked, will filter to:
-
rows matching the workerId of the currently selected booking, AND
-
rows which have at least one booking that is currently clashing
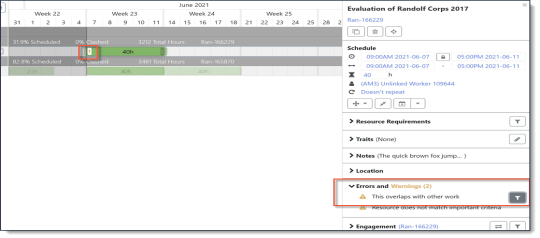
Clash warning and filter button
The clash filter only includes bookings that are in the current view and does not bring in anything new. For example, if a resource is booked in for 40 hours on three engagements and only two bookings are in the current view, the filter will only show you the two bookings.
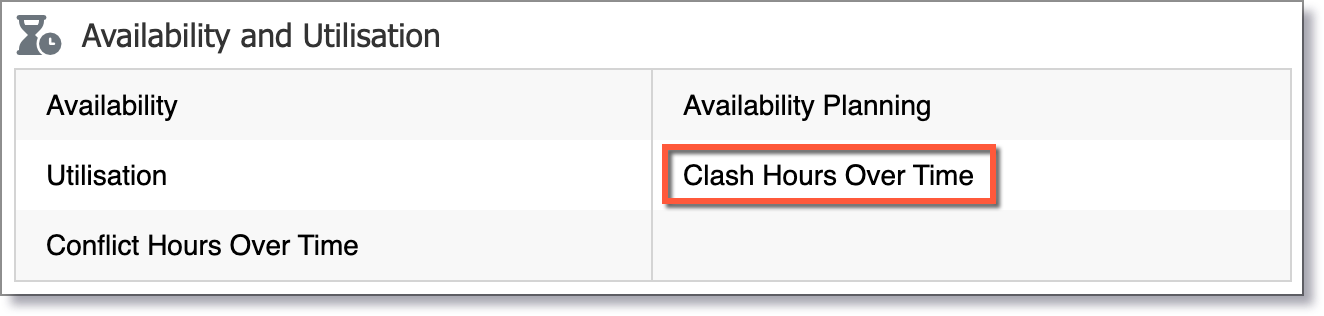
You can also view clashes in a report. To create a Clash Hours Over Time report:
-
From the main menu select Reports | Availability and Utilisation | Clash Hours Over Time.
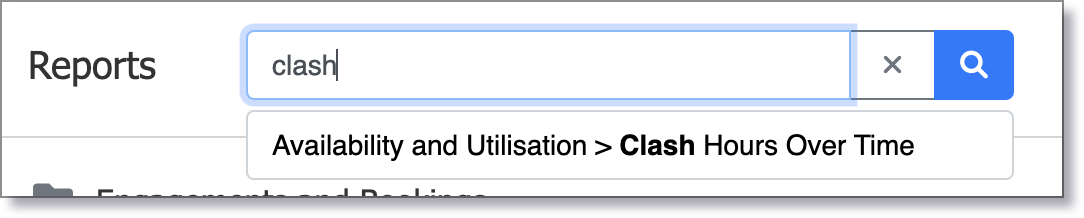
Alternatively, search for Clash Hours Over Time in the reports search bar:
-
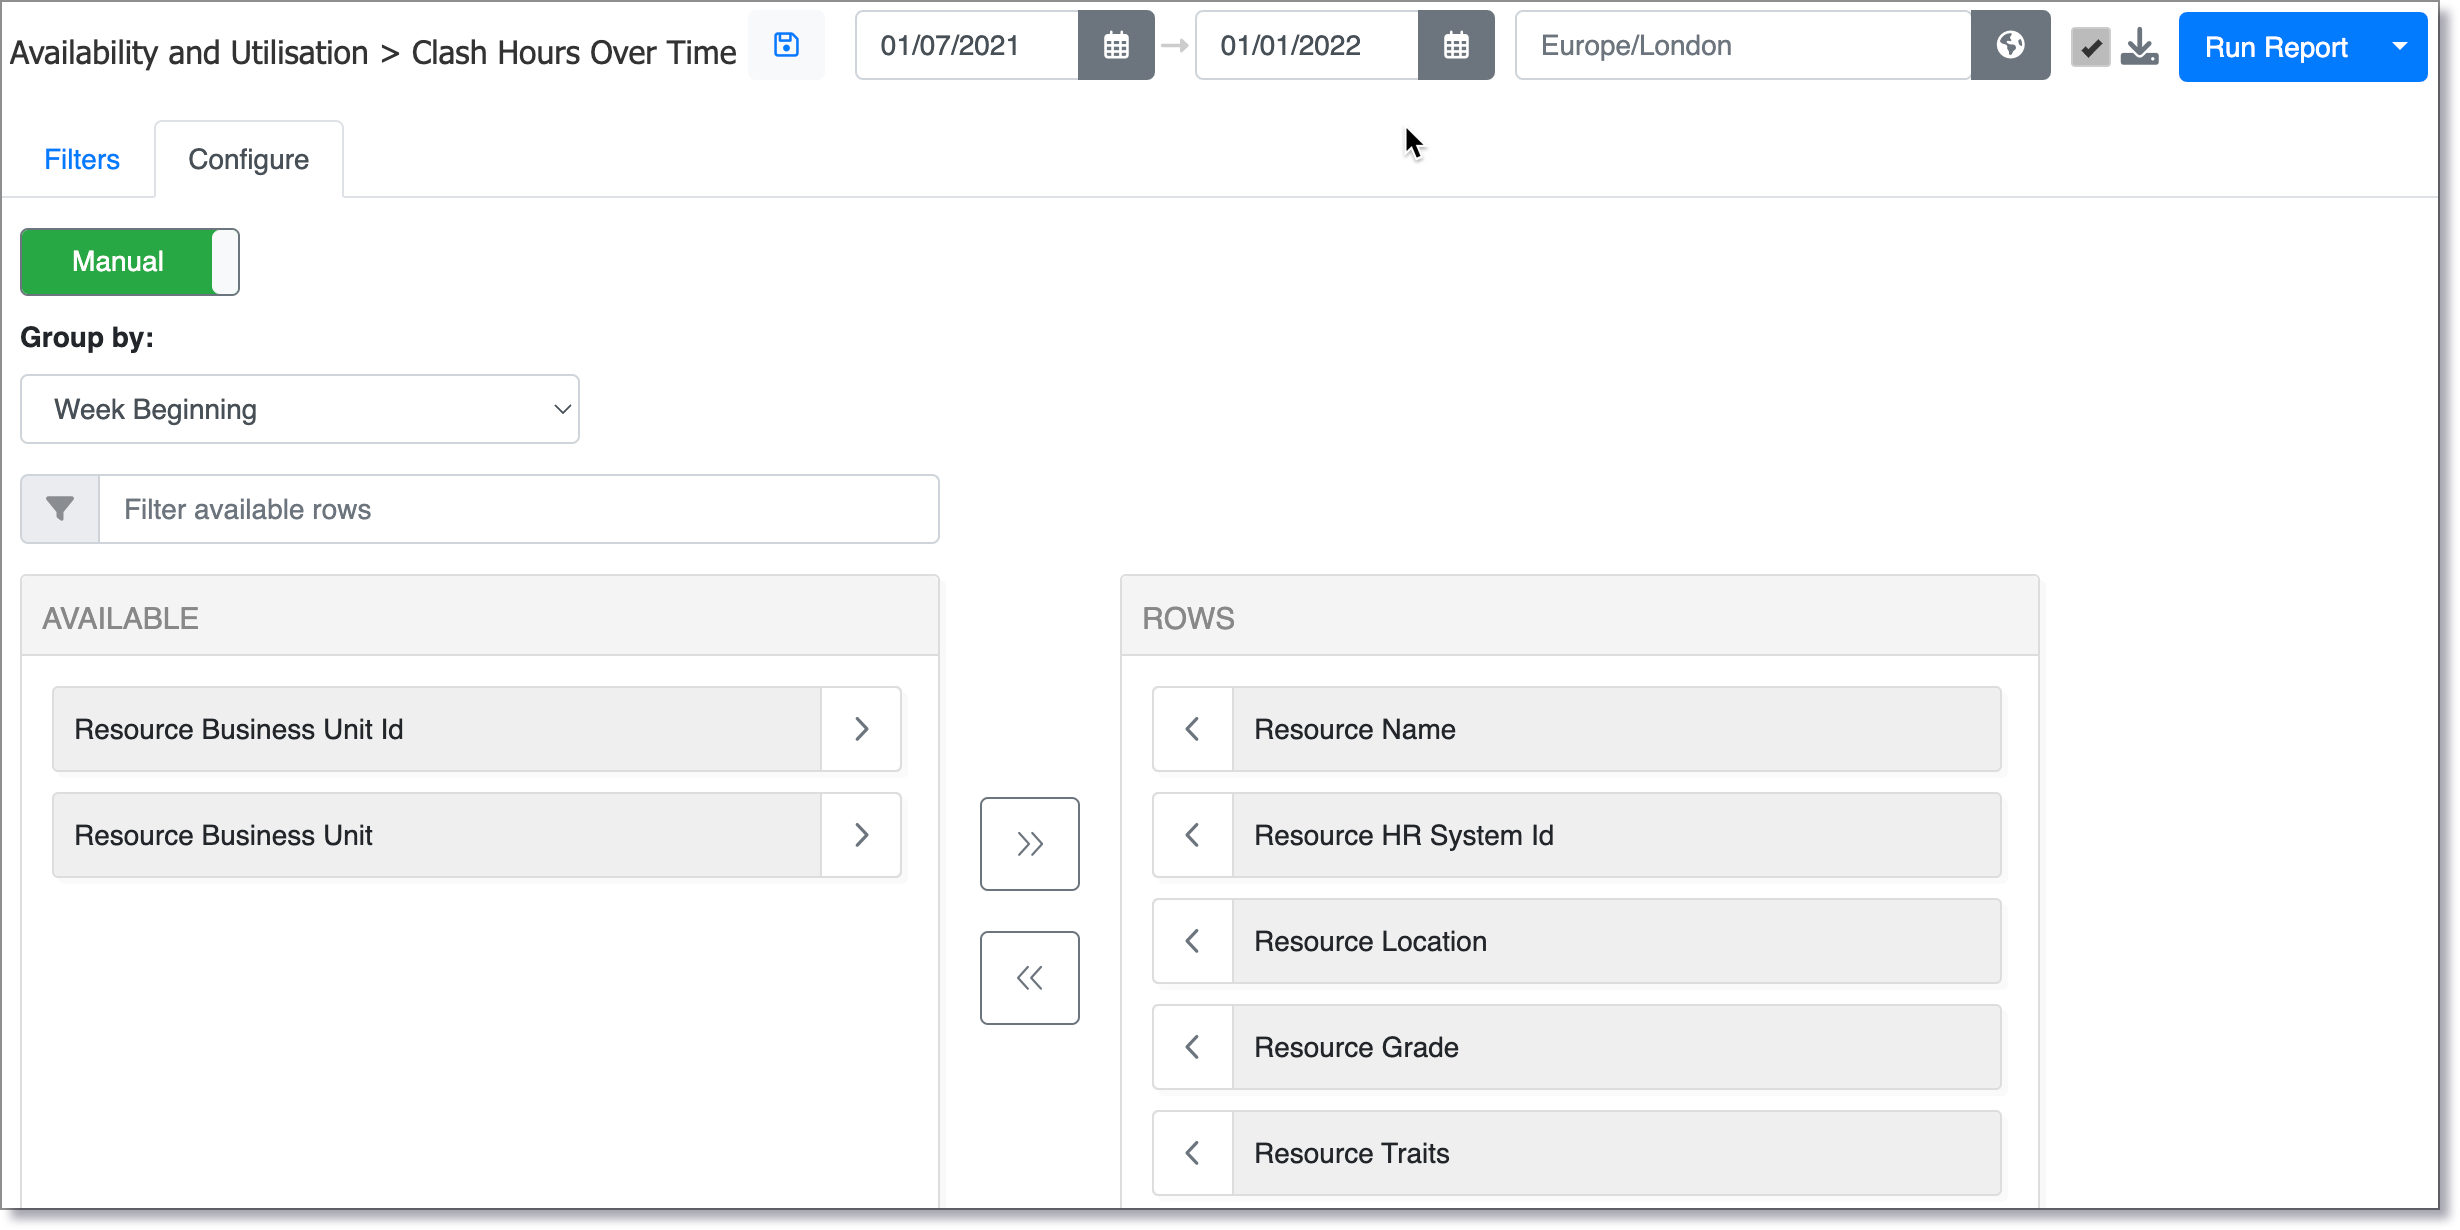
Choose the date range you wish to report on and then click the Configure tab to edit the rows for the report.
-
Click the > arrow in the AVAILABLE section to remove a field from your report.
-
Click the < arrow in the ROWS section to add a field to your report.
-
Click Run Report in the top right-hand corner.
-
The report will now download as an Excel document. For more details, see Reporting.